Live Streaming With OBS on Twitch, Facebook, and YouTube
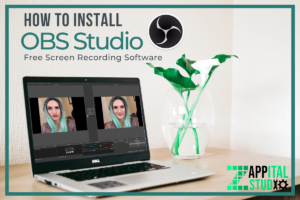
This tutorial includes a basic guide for how to stream with OBS. We’ll talk about how to use OBS to live stream to Twitch, Facebook, and YouTube from your desktop. Before continuing, you’ll need to install OBS Studio. You may want to also check out our basic guide on setting up and recording with OBS. Once you’re ready, let’s set up our live stream in OBS!
Select Where to Stream With OBS
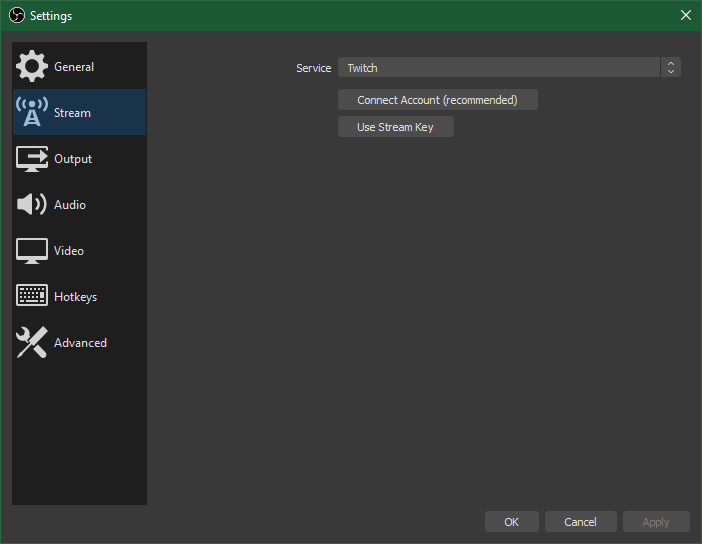
Open OBS, and go to “Settings” either under the “File” menu or by clicking the “Settings” button under the control box on the right side. Click on the “Stream” tab. Here you will select which streaming service you would like to use. Next, we will guide you through connecting OBS with Twitch, Facebook, and YouTube.
Live Streaming on Twitch with OBS
You should already have a twitch account created, which also creates a channel under your username. We will not be going into detail on setting up your twitch channel, only how to connect with OBS to live stream.
In OBS, select Twitch as your service. Then, you can either choose to connect your twitch account or you can manually add your stream key. If you click to connect your account, you will log in to twitch in a window inside OBS, and it will add your stream key for you. The other option is to click “Use Stream Key” to manually add your stream key.
Find Your Twitch Stream Key
If you click on the “Get Stream Key” button, it should take you to twitch. If you are logged in, it will take you to your stream key.
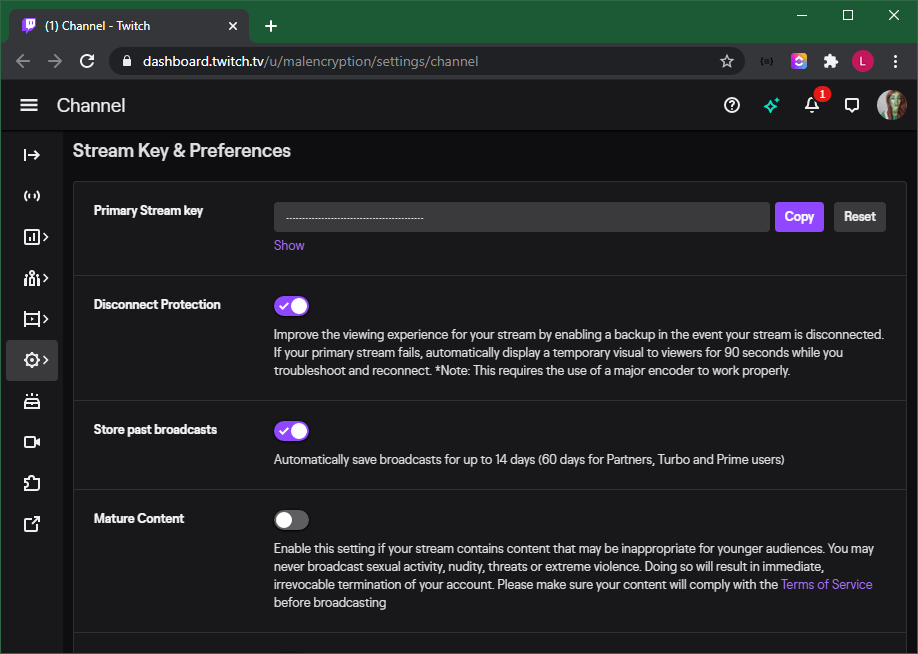
If not, go ahead and log in on twitch.tv. If you are not then sent to your stream key page, click on your profile circle in the upper right corner. Then, click on “Settings”, followed by “Channel and Videos”.
You should see “Stream Key & Preferences”, with your “Primary Stream Key” at the top. Go ahead and copy this key. Then, jump to adding your key in OBS.
Live Streaming To YouTube
Find Your YouTube Stream Key
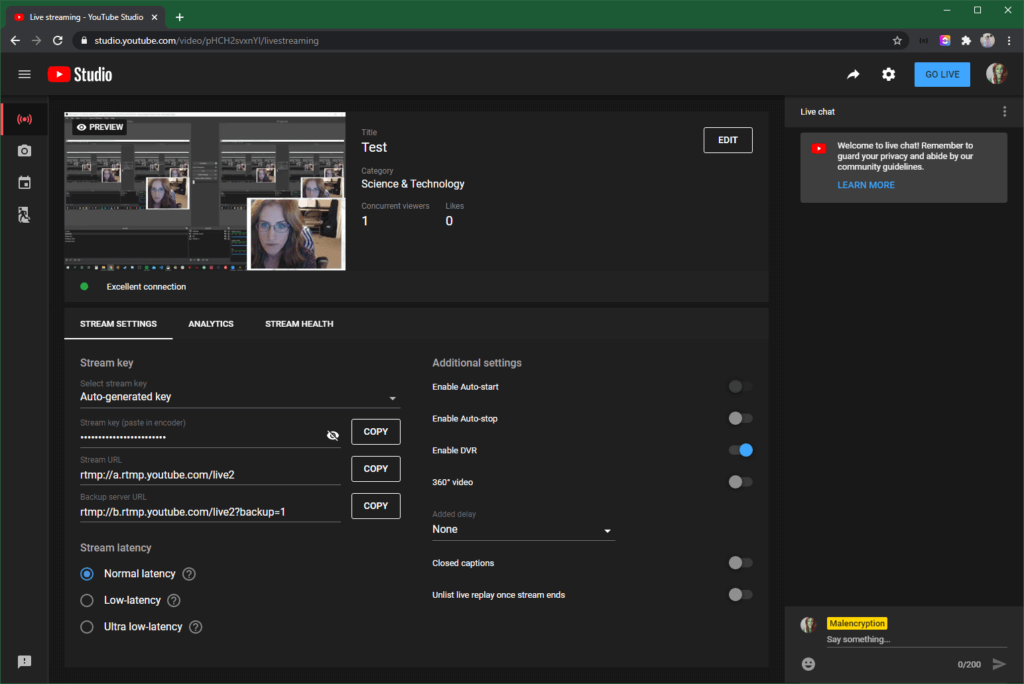
In your OBS stream settings, select YouTube as your service. If you click on the “Get Stream Key” button, it should take you to YouTube. If you are not already, go ahead and log in and choose the account and channel you’d like to stream to. You’ll be sent to your YouTube Live Dashboard.
You can stream from this live dashboard, or use the new live control room.
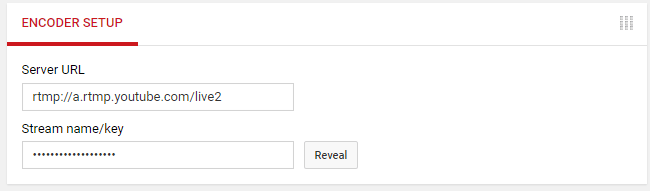
For the regular default live dashboard, if you scroll down the page a bit, you should see a box titled “Encoder Setup”. Inside it, you will see your “Stream name/key”. Click the “Reveal” button next to it, and then copy your key.
Before you start streaming, you’ll want to edit your title, description, category, thumbnail, and other options here in your live dashboard.
Once you add your stream key to OBS from this live dashboard, you will go live on YouTube right when you click on the “Start Streaming” button in OBS.
Using the New Live Control Room
If you decide to use the new live control room, you will use a different key you can copy there. Additionally, you will instead have the option to preview what is being streamed from OBS after you hit “Start Streaming”, but you will not be live on YouTube until you hit “Go Live” on YouTube.
Once you’re ready, jump to adding your key in OBS.
Streaming For the First Time on New YouTube Channels
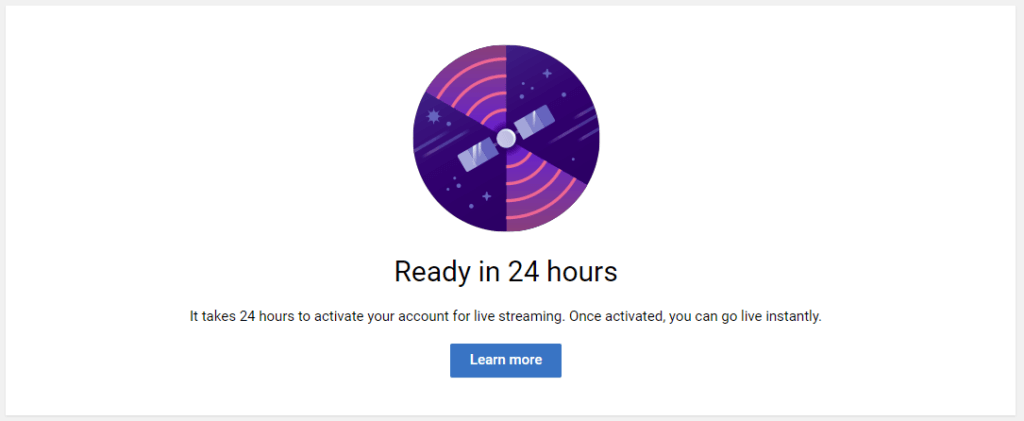
If you have a new YouTube Channel that has not yet been verified, you may see this screen.

You’ll need to verify your account and wait 24 hours before you can start live streaming. On this page, you’ll also see a live link that you can share when you go live. Note that this is your channel link + “/live”. This can be useful to save as this will always direct viewers to your live video while you are live streaming!
Go ahead and click “Get started”, and go through the steps to verify your account. Then, you’ll see this screen. Check your account in 24 hours and you should be ready to set up your live stream!
Live Streaming to Facebook
On Facebook, you can live stream from a page, a personal profile, a group, or in an event. When you click on “Get Stream Key” in OBS with facebook selected as your service, it will take you here, to the live stream creation page.

When you click on “Create Live Stream”, you may have a tutorial popup, which you can click the button until you see the “Get Started” box. Choose “Use Stream Key”, and click next. Click “Done”. If you’ve used this before, the tutorial may not popup, but regardless you can continue with the next step.
On the left side, you’ll see under your profile picture, a select box to choose where to stream. Select your timeline (personal profile), page, group, or event.
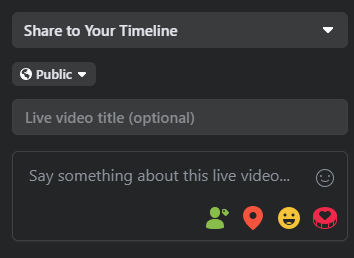
Scroll down in the main window, and you’ll see where you can select “Use Stream Key”. You will also see your “Live Stream Setup”. Inside this box, you’ll see your Stream Key. Copy it. After you add your stream key in OBS, you’ll be able to hit the “Start Streaming” button. With Facebook, you will not automatically go live when you turn on your stream in OBS. You need to click the “Go Live” button in your Facebook live producer window in order to actually go live to your chosen Facebook destination.
Adding Your Stream Key to OBS and Going Live
Back in your OBS settings, paste your stream key into the “Stream Key” box, and hit apply!
Now you are all set, and once your scenes are ready to go, you can hit that “Start Streaming” button! As mentioned before, with Twitch and the YouTube Live Dashboard, you will be live once you hit that button. If you use the YouTube Live Control Room or Facebook Live Producer, you will have to also hit the Go Live buttons in the respective windows in order for your stream to be live on those platforms.
Live Streaming with OBS Is Ready!
That’s it, now you should have OBS connected to live stream! Again, this was just a basic guide to get you connected, if you’d like more info on setting up scenes, audio, webcam, or windows on your desktop, check out our guide to setting up and recording with OBS.
Otherwise, if you’d like more detail about streaming to a specific platform, let us know and we can go into more depth in another post!
Troubleshooting and Further Resources
If for any reason you had issues, open your browser and head to OBS Studio’s quick start guide. Please consult the faq’s and forums there for troubleshooting, as well as the guides for live streaming on the platform you are trying to stream to. If you still need help, feel free to leave a comment here, or @ me on twitter.


Warning: Undefined variable $aria_req in /home/adasrubb/zappitalstudio.com/wp-content/themes/leesa/comments.php on line 83
Warning: Undefined variable $aria_req in /home/adasrubb/zappitalstudio.com/wp-content/themes/leesa/comments.php on line 89
Warning: Undefined variable $consent in /home/adasrubb/zappitalstudio.com/wp-content/themes/leesa/comments.php on line 96